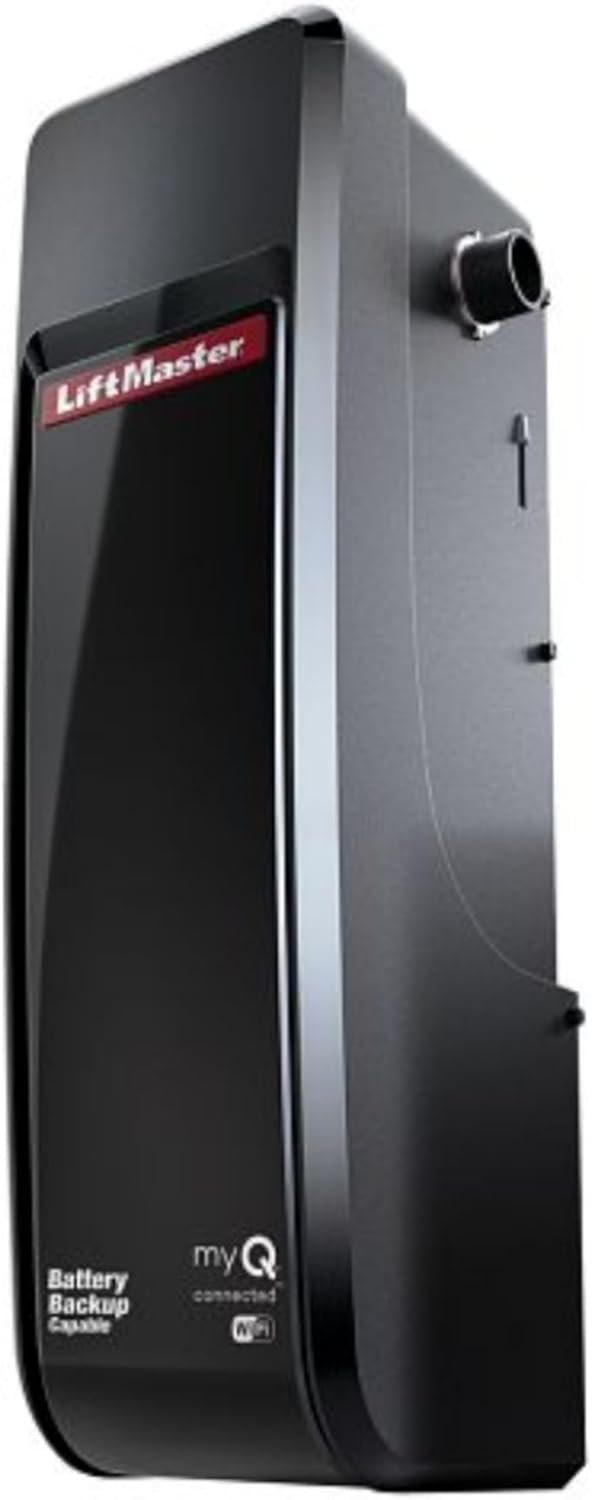
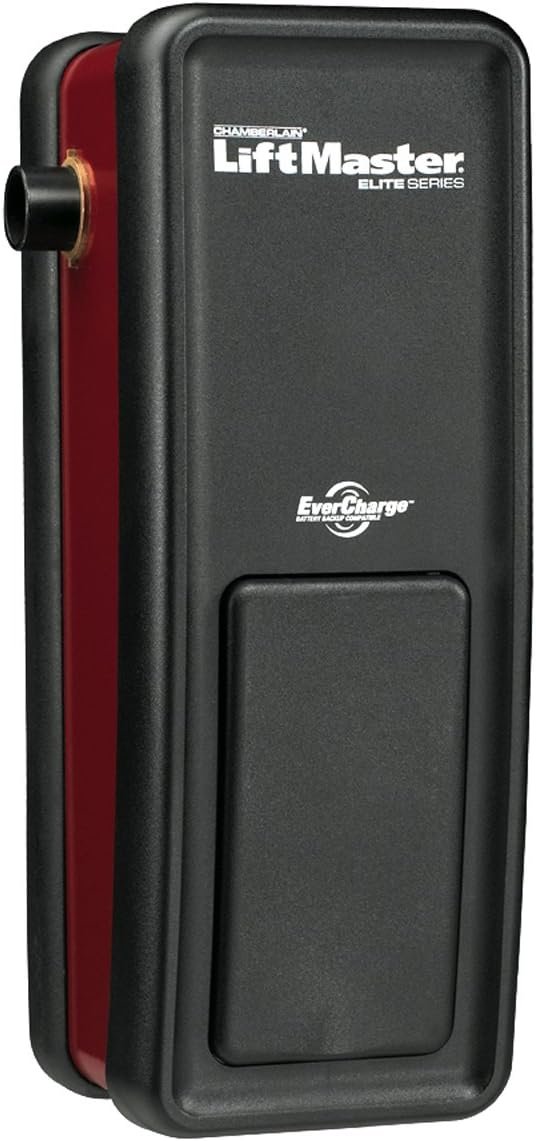
Left: LiftMaster 8500W (Wi-Fi) · Right: LiftMaster 8500 (standard Elite Series)
Wall-Mount Jackshaft · Built-in Wi-Fi · Battery backup (485LM)
View on Amazon →LiftMaster 8500 vs 8500W — Key Specs
| Spec | 8500 (Standard) | 8500W (Wi-Fi) |
|---|---|---|
| Opener type | Wall-mount jackshaft — drives torsion bar directly, mounts on wall beside door | |
| Compatible doors | Torsion bar sectional doors ONLY — NOT extension springs | |
| Motor | DC motor — quiet, smooth, soft start/stop | |
| Wi-Fi / myQ | No (add via 828LM gateway) | Yes — built-in 2.4 GHz |
| Max door width | 18 ft. | |
| Max door weight | 650 lbs | |
| Max cycles per hour | 10 — motor needs cool-down time | |
| Learn button color | Yellow (Security+ 2.0) | |
| Backup battery | 475LM | 485LM |
| Remote battery | 3V CR2032 coin cell | |
| Cable tension monitor | Required — included in box | |
| Automatic door lock | Power Door Lock | Model 841LM |
| Motor warranty | Lifetime | |
| Parts warranty | 5 years | |
LiftMaster 8500 / 8500W Blink Code Chart — Complete Diagnostic Guide
The 8500/8500W displays errors by flashing the UP and DOWN arrow LEDs in repeating patterns. You need the remote work light installed to see these clearly. Count the UP flashes, pause, then count the DOWN flashes.
| UP | DOWN | Symptom | Cause | Fix |
|---|---|---|---|---|
| 1 | 1 | Won't close, lights flash | Sensor wires not connected or cut | Check sensor wiring at opener terminals. White → terminal 2, white/black → terminal 3. |
| 1 | 2 | Won't close, lights flash | Sensor wires shorted or polarity reversed | Verify wiring polarity. White → white terminal (#2), white/black → grey terminal (#3). Replace shorted wires. |
| 1 | 3 | Wall control not working | Control wires shorted or panel faulty | Remove control, touch the two wires together — if door operates, replace the wiring or panel. |
| 1 | 4 | Won't close, lights flash | Sensor beam blocked or misaligned | Clear obstructions. Realign sensors until amber LED (sender) is solid and green LED (receiver) is solid. |
| 1 | 5 | Motor hums, door won't move | RPM sensor not detecting movement — mechanical jam | Unplug 5 seconds, restart. Check door balance. Call technician if problem persists. |
| 1 | 6 | No movement at all | Motor circuit or logic board failure | Call LiftMaster support or authorized dealer — do not attempt board repair. |
| 1 | 7 | Door stops or reverses closing | Cable tension monitor detecting cable slack | Check cable tension monitor wiring (green terminal). Check for cable slack on opposite side of door. |
| 1 | 8 | Door stops, lock noise heard | Automatic door lock not releasing before door travels | Check lock wiring and connector at opener. Test lock manually. Replace lock if faulty. |
| 1 | 9 | Door reverses while closing | Obstruction detected or cable tension monitor triggered | Remove obstructions. Check cable tension monitor connection. Inspect cables for slack. |
| 1 | 10 | Door stops while opening | Door traveling past programmed open limit | Reprogram travel limits. Check that nothing blocks upward travel. Check door balance. |
| 1 | 11 | Opener tries 3 times then stops | Excessive force required — door binding or out of balance | Check door balance. Call door technician. Do not force the door. |
| 10 light flashes | Door reverses immediately | Sensor beam interrupted during closing | Align sensors until both LEDs solid. Clear any obstruction between sensors. | |
The Most Common 8500/8500W Problem — Collar Slipping
If your 8500 keeps losing its travel limits — the door suddenly stops in the wrong position, doesn't open or close fully, or resets limits after a few cycles — the collar is almost certainly the cause. The collar clamps the motor shaft to the torsion bar. When the set screws loosen from vibration, the opener loses its reference point and limit settings reset or drift.
How to Fix a Slipping Collar
- Unplug the opener from the wall outlet.
- Locate the collar — it's the metal clamp connecting the motor shaft to the torsion bar.
- Using a 3/16" hex key wrench, check each set screw. If any have loosened, re-tighten:
- Hollow torsion bar: tighten to 12–14 ft./lbs. using a torque meter
- Solid shaft: tighten 1/4 to 1/2 turn past first contact — do not overtighten
- Keyed bar: do NOT tighten set screws into the keyway
- Plug the opener back in and reprogram the travel limits.
- If the collar shows visible wear marks or the set screw holes are stripped, the collar needs replacement.
What Is the Cable Tension Monitor? (8500-Specific Safety Device)
The cable tension monitor is a safety device that the 8500/8500W has and standard ceiling-mount openers do not. It mounts on the wall near the door cable and monitors cable tension while the door operates. If a cable goes slack — from a broken cable, a spring problem, or severe imbalance — the monitor stops the door from closing, preventing the door from slamming down unsupported.
The cable tension monitor connects to the green quick-connect terminals on the opener. Blink code 1-7 means it has detected cable slack. The door will not operate in the down direction without the monitor properly connected.
If you get a 1-7 code: first check that the green wire is securely connected at the opener. Then check both cables for slack — with the door closed, both cables should be taut. If a cable is loose, the cable or spring system needs professional attention before using the opener.
Battery Guide — 8500 vs 8500W
The remote battery is the same for both models. The backup battery differs by model.
| Battery Type | 8500 (Standard) | 8500W (Wi-Fi) |
|---|---|---|
| Remote battery | CR2032 (3V coin cell) | CR2032 (3V coin cell) |
| Backup battery | Model 475LM | Model 485LM |
| Backup replace interval | Every 1–2 years — or when LED shows solid red + beeping | |
| Battery LED | Meaning | Action |
|---|---|---|
| Solid green | Fully charged | Normal |
| Flashing green | Currently charging | Normal — wait |
| Solid orange + beep | Running on battery (power out) | Check breaker |
| Flashing orange + beep | Battery low | Restore AC power soon |
| Solid red + beep | Replace battery | Order 475LM or 485LM |
$30–$45
$25–$40
$6–$10
Programming the 8500 / 8500W Remote
Both models use the yellow Learn button and Security+ 2.0 rolling code technology. Programming is done through the myQ Control Panel (8500) or Smart Control Panel (8500W) — not directly from the opener unit buttons, which are only for travel and force programming.
- On the wall control panel, go to Menu → Program → Remote, or press and release the yellow LEARN button on the opener unit. The LED glows for 30 seconds.
- Within 30 seconds, press the button on your remote until the opener lights flash to confirm.
- Test the remote. To erase all remotes: hold the LEARN button ~6 seconds until the LED goes out.
$30–$45
$30–$45
myQ Setup — 8500W Only
The 8500W has built-in Wi-Fi (2.4 GHz only — not 5 GHz). Setup takes about 10–15 minutes.
- On the Smart Control Panel, go to Menu → Program → Wi-Fi Setup, or press the yellow LEARN button on the opener 3 times rapidly. Blue LED blinks.
- On your phone, connect to the Wi-Fi network starting with "MyQ-".
- Open a browser and go to setup.myqdevice.com. Enter your home 2.4 GHz Wi-Fi password.
- Download the myQ app, create an account, and add the opener by serial number.
If myQ disconnects: press and hold the black ADJUSTMENT button for 6 seconds (3 beeps) to clear Wi-Fi, then repeat setup. Visit WiFiHelp.LiftMaster.com for connectivity help.
Note: the standard 8500 (no built-in Wi-Fi) can add myQ capability via the Model 828LM Internet Gateway accessory.
8500 / 8500W Maintenance Schedule
| Task | Frequency | Who |
|---|---|---|
| Test safety reversal (2x4 on floor, door must reverse) | Monthly | Homeowner |
| Test door balance (halfway up, should hold position) | Monthly | Homeowner (test) / Tech (fix) |
| Test cable tension monitor | Monthly | Homeowner |
| Test automatic door lock (should engage after 3 seconds) | Monthly | Homeowner |
| Check sensor alignment (both LEDs solid) | Monthly | Homeowner |
| Lubricate rollers, hinges, bearings, collar/shaft | Annually | Homeowner |
| Check and re-torque collar set screws | Annually | Homeowner or tech — critical |
| Test backup battery | Annually | Homeowner |
| Replace backup battery (preventative) | Every 1–2 years | Homeowner |
| Professional spring, cable, track inspection | Every 2–3 years | Trained technician — required |
Parts Reference
| Part | 8500 Model | 8500W Model |
|---|---|---|
| Backup Battery | 475LM | 485LM |
| Remote battery | CR2032 (3V coin) | |
| Wall control panel | 888LM / 889LM | 880LMW |
| Work light | Remote Light (A19 bulbs) | 827LM LED Light |
| Door lock | Power Door Lock | 841LM |
| Cable Tension Monitor | With green/white wire — replace if damaged | |
| Safety sensor kit | Sending + receiving sensors — 041A5034 | |
| Remote control | 893MAX (Security+ 2.0) | |
| Add myQ to 8500 (no built-in Wi-Fi) | 828LM Internet Gateway | N/A — built-in |
Is the 8500 Right for My Garage?
The 8500/8500W is the right choice when you need ceiling clearance — for vehicles with roof racks, kayaks, or tall cargo — or when your garage has a high-lift door system that a standard rail-mount opener cannot accommodate. It's also a good upgrade for low-headroom garages where the standard 2-3 inches of clearance above the door is not available.
It is NOT the right choice if your door uses extension springs (the springs that run along the horizontal tracks on each side). This opener requires a torsion spring system — the horizontal bar above the door. If you're not sure which system you have, a technician can assess it quickly.
Get 8500 Service in North Alabama
The 8500/8500W is a more complex install and service than a standard opener — collar torque, cable tension monitor, and the automatic lock all require specific knowledge. If you're having issues beyond what the blink codes and troubleshooting steps above can resolve, use our verified directory to find a LiftMaster-authorized technician in Huntsville, Madison, Decatur, or Athens.
Open until 10 PM · LiftMaster authorized
24/7 · All North Alabama